Showing posts with label Recycled. Show all posts

Monday, December 13, 2010

Costume Jewelry Trees


I wish that I could take credit for this, but I can't.  My mom can!  This is one of my most cherished Christmas pieces, and I have only had it for two years!  This piece is made with my grandmothers costume jewelry!

My mom purchased picture frames and wood to make this.  With your wood cut out a christmas tree shape, attach to a piece of wood covered in fabric and frame.  Then slowly and surely begin attaching your costume jewelry.  A lot of the "hardware" of the jewelry was taken off so the pieces lay flat.

This would work with any jewelry or beads that you can find, either old or new!

Friday, October 1, 2010

Dirt.

As my garden is ending, I am thinking all about my dirt. I felt this year, for numerous reasons, my garden did not do as well as others.  The biggest, the dirt. I've gardened in the same patch for three years now, and am feeling like it needs some help whether it be manure or compost.

So I have done a bunch of research about composting and how to get started, and came across this interesting fact. You can add all your dryer lint to your compost heap.

Which led to this... Replanting one of my indoor plants.


I was combining two plants into one, and realized I didn't have enough potting soil to fill my larger pot!


But I did have all that dryer lint I was saving for my compost pile!


Plant right on top!


Tuesday, July 13, 2010

Gotta love a friendly competition!

While browsing over at Lil Blue Boo, I saw this cute competition that I might just join in on the fun!


The details are here and here ( The original end date was changed! We have until August 15th to get a project done!)

Thursday, June 10, 2010

Recycled can planter!

I was going to enter this for Iron Crafter, over on Fireflies and Jellybeans, and never got around to it. Maybe next time...


This is so simple, I don't even think I need to use words...


I guess I do now! Ha!  Fill your can with potting soil, add wire or ribbon to the side whole. Add plant. and hang!


I am envisioning a whole wall or fence outside, with each can a different size and color!  Bonus, I believe if you spray paint the can you don't have to worry so much about rust!
I think I will start saving my cans!

Monday, April 19, 2010

Renewing Life in my BBQ Tools!

Yup! You read that right!

We love to BBQ but seem to forget out tools outside after we are done, and the handles chip and get all yucky... Well, I don't want to eat whatever flakes off the handles, so I fixed that problem with Spray Paint!

See how blah they look? Not anymore!


Here's what I did!

Put a plastic bag over the metal part that you use on your food, and taped it down...


Added some spray paint... This was Rustoleum "Aqua" so it was water based, and kinda needed alot of coats... ( Not sure if I like it...)


Removed tape and plastic.. And Ta-da! Better than new!


A gift for Molly!

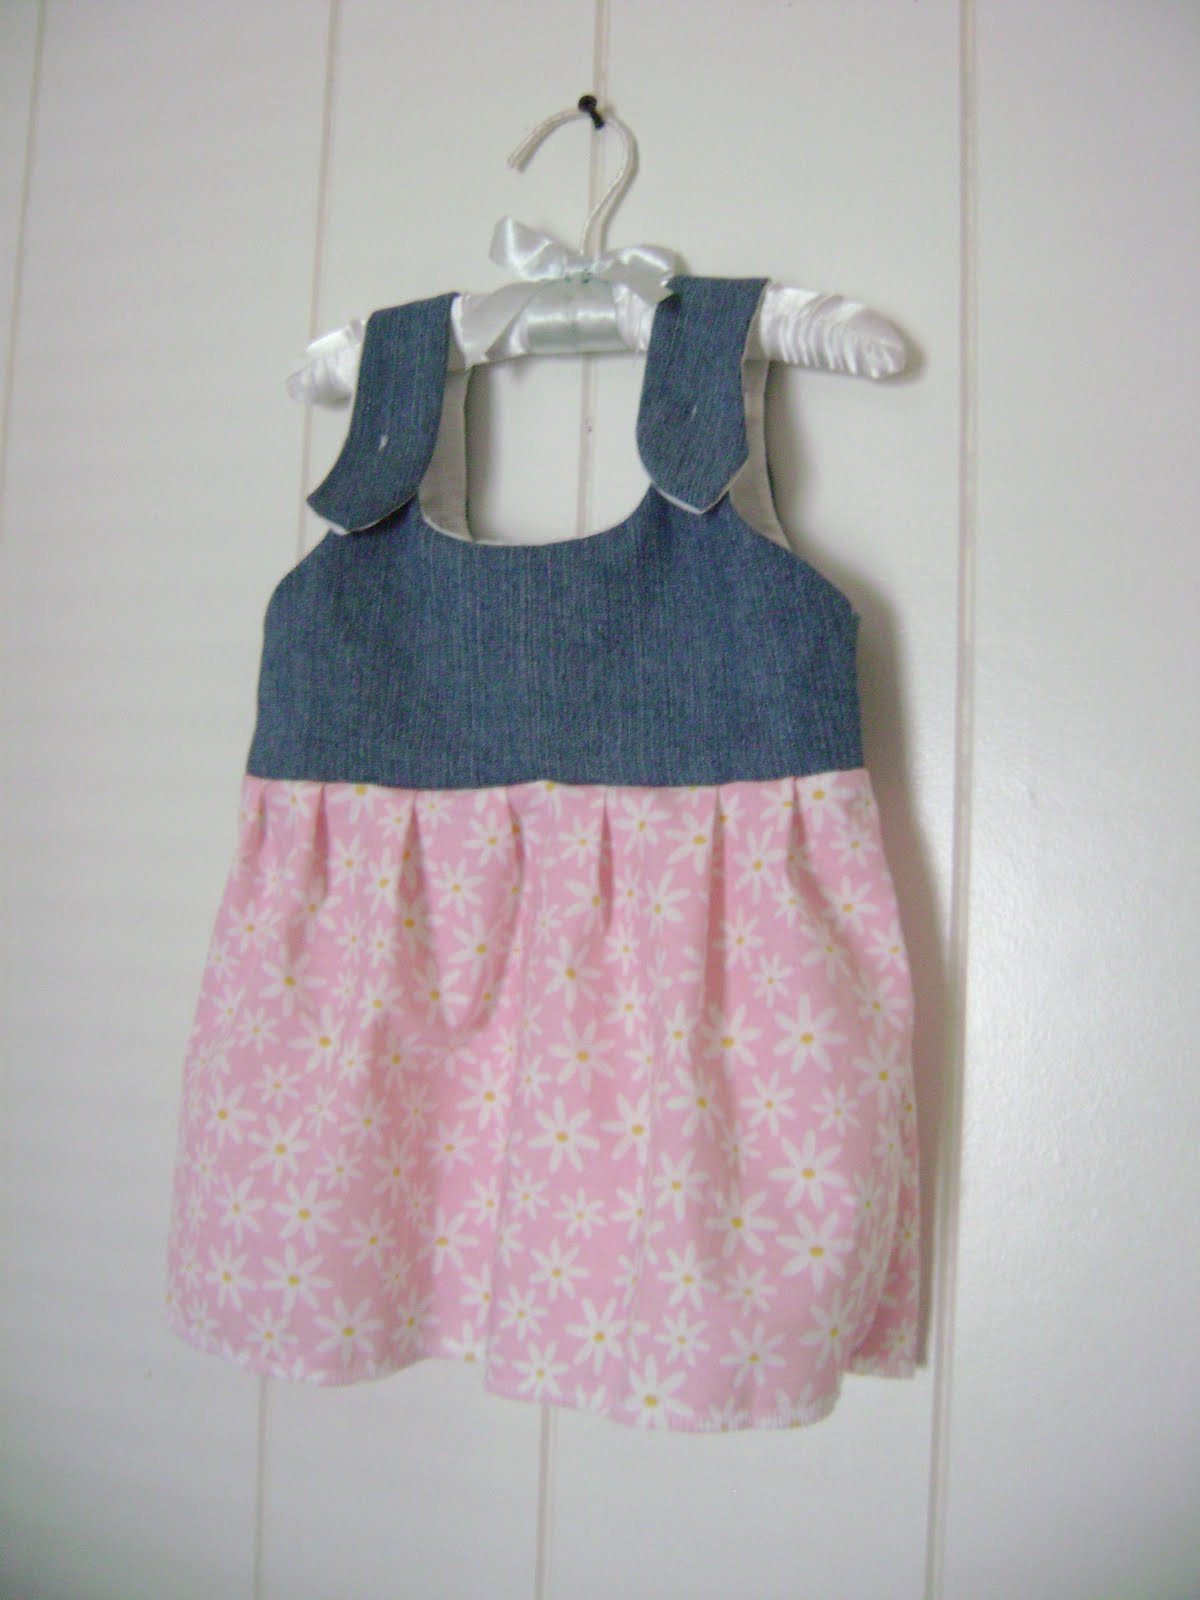
Using the Itty Bitty Dress by Rae, I made this darling dress for Molly.. It took no time to make, and there is even a link for a larger size! I did a mixture of the two because Molly is one... But it fit my son who is 14 months old.. So I know it will fit her!


The top is actually made from a pair of adult jeans! I love being able to reuse things!


Friday, April 16, 2010

I love saving money!

So, our son is loving playgrounds and swing sets, so we decided we would either build or buy one. And either way we would need a infant/toddler swing for him.  At a garage sale we found one for $1.50! But it was kinda faded to pink, so I sprayed it green.
Faded Pink:

And now...Just like new!

Now we just need something to hang it on!


Monday, April 12, 2010

Reusable Zipper Bag

Okay, so when So You Think You're Crafty had these on their kitchen week... I fell in love!  Sarah from Create Studio, made these and I loved them! But I am a zipper kinda gal, so I took the idea and ran with it!


Here's what I did!

Supplies:
Fabric ( I just measured my bag plus a little, so it depends on what size zipper bag your using)
Scissors/Rotary Cutter
Zipper Bag
Sewing Supplies ( Machine, Thread, Etc)


To measure my fabric, I just placed my bag on top and gave myself some room on each side.


Prepare your plastic bag, cut a straight line down the side removing the excess of the zipper that was thick.
See how the end looks different? You want to get rid of that so that your bag turns right side out better...


Open up your bag, like this... Just wiggle the plastic "toggle" off and save.


Fold over the short side ( top) of your fabric, and pin it to fabric making a nice clean edge on the outside of the bag.  Sew.  REMEMBER you are going to put the toggle back onto the bag, so leave plenty of room for it to move freely above the fabric.  ( See how the "toggle" is still on the bag? Thats so I could measure where to sew)

Reattach your "toggle"  Just slide it back on. I zipped it open and close a couple times to make sure it worked.  Then flip bag inside out, I zipped it half closed and then flipped.


Turn your bag inside out and sew the two side seams, making sure you get both the bag and fabric.  Trim off excess.


Flip right side out and your done!  Now, your lunch bags look great, and you feel guilty about throwing them out! So your being *green* and saving the enviroment all while being cute!


I added this post, to the Link Party over at Keeping it Simple!

Friday, April 9, 2010

The best and free bubble maker!

Thank you so much Betz White!  I finally got around to making one, and now I am addicted!  I think many of our plastic bottles will become this!

I can't believe the supply list!

Washcloth, Rubber band, and a bottle!  Yup! That's all!


Cut off bottom of bottom, add washcloth with rubber band and your done!  I hot glued in a couple places just to make sure it was secure...


And best of all, Carter approves!


Thursday, February 25, 2010

Guitar String Bracelets

When I was in high school, I began taking guitar lessons, and I really liked it a lot. Then my teacher decided to coach soccer instead, so my lessons stopped and so did I.  Over the years I have gone back and forth wanting to play here and there, and I just took it up again recently.

I began by changing my strings, and after pulling the old ones up. I just left them on the counter, thinking I wonder how I could reuse these? After a couple days I came up with this...
What do you think?


Tuesday, February 23, 2010

Easy Hair Bow Holder

My god daughter was turning one, and she is just starting to be able to wear hair bows.  So of course, I wanted to make some, but I didn't want to just do that.  So I got thinking, how could I give her something to hold them...  I've seen the bow holders, made out of picture frames before ( a good example would be here) but i never find any great frames that big so... That idea was out. But I did have a simple frame that I could jazz up too.. So here is what I came up with...


I used a 5 x 7 wooden frame that was flat.  I spray painted it gold, and then glued pretty pink scrapbook paper on the flat part of the frame.  Using and Exacto knife I cut out the center after it was glued down.  I then sanded the edges with an emery board to clean up them up.


Next I added the ribbon, buttons and flower to the front for decoration, and cut the paper to go inside the frame.

I cut three ribbons for the back of the frame and glued them on too.  And can you believe what I am about to say....Done! It's that Easy!

What I really like is that it can use this as a dry erase board too, maybe for notes about missing bows?


Monday, February 22, 2010

Dry Erase Board

After we moved into our house, I purchased a dry erase board on sale.  After three years, it had finally decided it was no longer going to clean itself off.  After saying, well this is silly to throw out, why not take it apart? So I did, and found out it would not clean off because it was just a piece of shiny poster board in picture frame, over a piece of sheet metal ( to make it magnetic).

So... Here's what I ended up doing, I tried the dry erase markers with the sheet metal, and ta-da it cleaned off better and easier than the poster board! So, seeing as I do not have any shiny metal anywhere inside, I sent it out to the garage, where my husband works on cars, and he could have his own board to make lists and what not.  I would love to show you this, but I am pretty sure if I brought my camera out into the garage, I may never make it back...

With my board gone, I needed a new one for my kitchen, and didn't want to go out and buy one right away... And I had this frame empty in my kitchen already... And got to work.

All you have to do it fill your frame with a piece of scrapbook paper...And it cleans off easier than any store bought board I have ever had!