

Friday, April 30, 2010
Busy As a Bee!
This is it! My first Craft Fair is this weekend... Look for a shop update next week... Anything that doesn't sell at the fair will be part of my etsy shop opening... And I am thinking about a giveaway too!
Tuesday, April 27, 2010
Some of my Craft Fair Wares!
Here is what I took pictures of so far! Enjoy.. If interested email me and we can work something out via mail or pickup!


Little Birthday Hats! 8 inches high!
( I have 4 other colors to choose from!)

Big Birthday Hats! 12 Inches Tall!
(I have 8 more to choose from!)

Kids Chef Hats!
(I have 3 more colors to choose from, and two hats per colorway!)

A Little Girl Apron!
(As for right now, this is my only little girl apron complete, I am working on a couple more!)

Pacifier Clips!
( What you see is what I have!)

A Chalk Board Tray!
(Two more available, Exactly the same)

A Cork and Chalkboard Note Station!
(Two more available, exactly the same)
I also have lots of photography that I have taken and printed in my own darkroom over the years. These vary in sizes, and images. They will be brought to the craft fair too, and hopefully some will make its way to our etsy shop next week!
Monday, April 26, 2010
Seriously? I have to be sick today?
I can't believe it. Our family got a cold or allergies or something. But we all feel like junk. And I am in the home stretch of my first Craft Fair... So.. In between soup making, and popsicle messes I am slowly finishing up some loose ends..
I worked on these this weekend... Cute Lil' Girl Hair Bows!

I worked on these this weekend... Cute Lil' Girl Hair Bows!

Today, I plan on creating an inventory of whats up for sale at the craft fair so I will take pics to share tommorow! And whatever does not sell at the craft fair will be up for grabs mid to late next week on my Etsy shop! And yes, I am making the leap. All i need is to upload my stock and its open! Wish me luck!
Friday, April 23, 2010
Glossy Business Cards Tutorial
In preparation for the Craft Fair on May 2, I decided I wanted to make some business cards. But you know the drill, everytime you go to print something your out of ink... And then I got thinking, well I could do some through an online service, but none were going to make it here in time ( well they could have but the shipping was too much for my taste).
My photography degree and Photoshop experience came in handy, when I decided to create a business card out of 4x6 prints that I can print at my local drugstore ( Another perk? They give you 50 free when you first sign up!)
Here's what I did:
1. Open Photoshop and Create a file:

2. Began designing my business card ( To match my blog of coarse!) on the top third of the file. I also created guides at 3.5" wide and 2" and 4" length. ( This let me create three cards per page).

3. Once happy with my card, I selected all the layers needed, and copied them.

4. Move the copied files around document to line them up in the guides.

5. Saved my file. I saved it as a photoshop and a jpeg just in case they come back and need editing.
6. Uploaded to my local drugstore and now I have 150 FREE glossy business cards, All i have to do is cut them when I get them back! Even if you cannot get free prints, think about it three cards per 4x6 (Snapfish is normally 9 cents per... So it would not be much to make a batch of cards! And my local drugstore was only going to be $10)
Even if you do not have Photoshop, you can do this. Just make sure to save it in a jpeg format and the photo center will be able to print them!
Thursday, April 22, 2010
Getting my Craft Fair On!
Thats right! All Things Fee is doing its first craft fair! Eeek! And I have less than three weeks to prepare! Eeek Eeek! But I think I can handle it! If your in the Mechanicville Area, stop by the Elks Club on Park Avenue May 2, between 9 and 3!
Here are some of the things I have been working on... Email me if you interested in anything! I can always make a double for you, or for the fair...

Little Girl Hair Clips!

Embellished Dishtowels!
Monday, April 19, 2010
Renewing Life in my BBQ Tools!
Yup! You read that right!
We love to BBQ but seem to forget out tools outside after we are done, and the handles chip and get all yucky... Well, I don't want to eat whatever flakes off the handles, so I fixed that problem with Spray Paint!
See how blah they look? Not anymore!

Here's what I did!
Put a plastic bag over the metal part that you use on your food, and taped it down...

Added some spray paint... This was Rustoleum "Aqua" so it was water based, and kinda needed alot of coats... ( Not sure if I like it...)


Removed tape and plastic.. And Ta-da! Better than new!

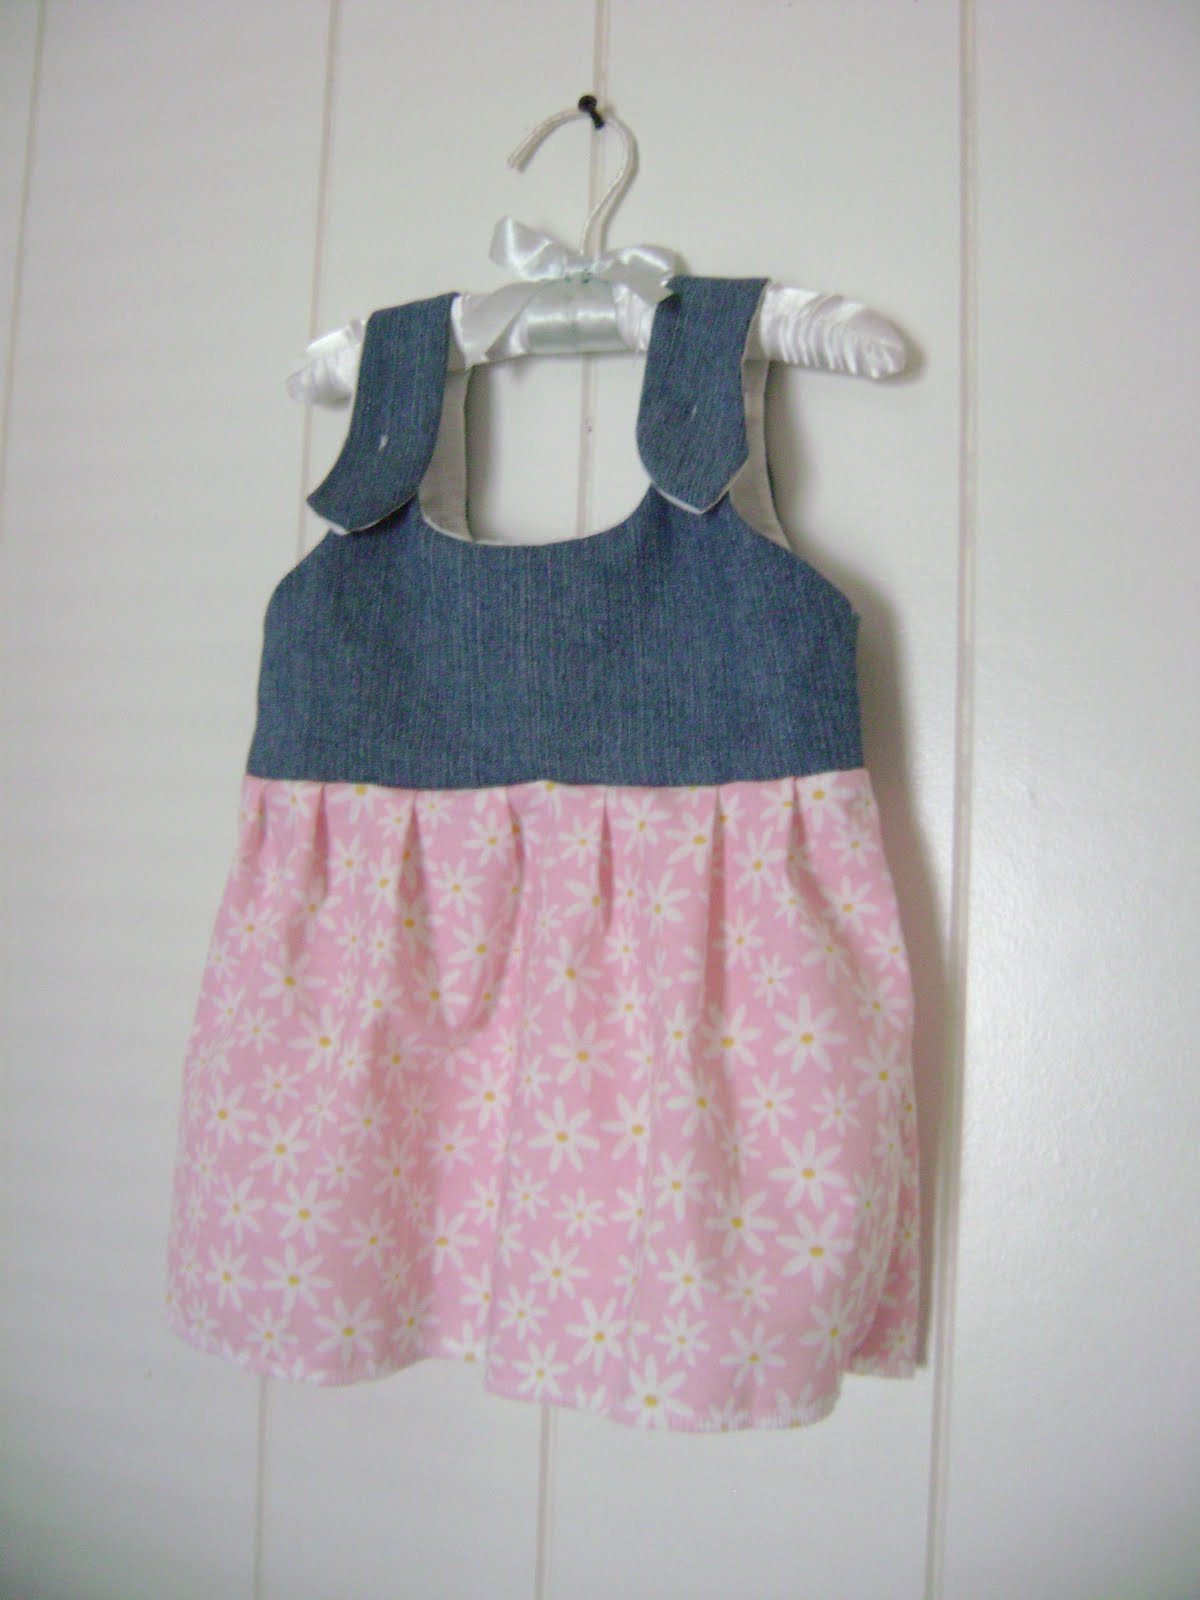
A gift for Molly!
Using the Itty Bitty Dress by Rae, I made this darling dress for Molly.. It took no time to make, and there is even a link for a larger size! I did a mixture of the two because Molly is one... But it fit my son who is 14 months old.. So I know it will fit her!

The top is actually made from a pair of adult jeans! I love being able to reuse things!

The top is actually made from a pair of adult jeans! I love being able to reuse things!

Friday, April 16, 2010
I love saving money!
So, our son is loving playgrounds and swing sets, so we decided we would either build or buy one. And either way we would need a infant/toddler swing for him. At a garage sale we found one for $1.50! But it was kinda faded to pink, so I sprayed it green.
Faded Pink:

And now...Just like new!

Faded Pink:

And now...Just like new!

Now we just need something to hang it on!
Thursday, April 15, 2010
Blog Button Take Two!
Alright, so the first time I attempted this.. It was a no go.. Well today, I think I may have got it! Here is my button, hopefully you will be able to get it for your space too!

(this is just an image... Go to the left for the real deal!)
After scouring the internet looking for how to do it.. It took many mistakes to come across the easiest way to figure it out... But here it is...
If you look over on the left it worked!
Wednesday, April 14, 2010
I've been "featured"!
Last week I entered my Dry Erase Calendar over at Roots and Wings Co's link party... And this week they "featured" me as their inspiration! How exciting... This is a first for me! Make sure to go on over and check out their blog!
I also added my zipper bags to these link parties!


I also added my zipper bags to these link parties!
Tuesday, April 13, 2010
Sharing the Love!
Love handbags? Love Homemade?
Checkout my friend Mel and her MelBags!

She has a couple different styles available, from
The Original MelBag,

to beachbags,

and now a bag insert!

Monday, April 12, 2010
Reusable Zipper Bag
Okay, so when So You Think You're Crafty had these on their kitchen week... I fell in love! Sarah from Create Studio, made these and I loved them! But I am a zipper kinda gal, so I took the idea and ran with it!
Here's what I did!
Supplies:
Fabric ( I just measured my bag plus a little, so it depends on what size zipper bag your using)
Scissors/Rotary Cutter
Zipper Bag
Sewing Supplies ( Machine, Thread, Etc)

To measure my fabric, I just placed my bag on top and gave myself some room on each side.


Turn your bag inside out and sew the two side seams, making sure you get both the bag and fabric. Trim off excess.

Flip right side out and your done! Now, your lunch bags look great, and you feel guilty about throwing them out! So your being *green* and saving the enviroment all while being cute!
I added this post, to the Link Party over at Keeping it Simple!
Here's what I did!
Supplies:
Fabric ( I just measured my bag plus a little, so it depends on what size zipper bag your using)
Scissors/Rotary Cutter
Zipper Bag
Sewing Supplies ( Machine, Thread, Etc)


Prepare your plastic bag, cut a straight line down the side removing the excess of the zipper that was thick.
See how the end looks different? You want to get rid of that so that your bag turns right side out better...

Open up your bag, like this... Just wiggle the plastic "toggle" off and save.

Fold over the short side ( top) of your fabric, and pin it to fabric making a nice clean edge on the outside of the bag. Sew. REMEMBER you are going to put the toggle back onto the bag, so leave plenty of room for it to move freely above the fabric. ( See how the "toggle" is still on the bag? Thats so I could measure where to sew)

Reattach your "toggle" Just slide it back on. I zipped it open and close a couple times to make sure it worked. Then flip bag inside out, I zipped it half closed and then flipped.


Flip right side out and your done! Now, your lunch bags look great, and you feel guilty about throwing them out! So your being *green* and saving the enviroment all while being cute!
I added this post, to the Link Party over at Keeping it Simple!
Subscribe to:
Posts (Atom)