Showing posts with label Recipe. Show all posts

Wednesday, November 14, 2012

Cooks: Pumpkin Spice Rice Pudding!

Hi! My name is Felicia and I am a pumpkin-aholic. 
If it's got Pumpkin or Pumpkin Spice in the name, I'll try it.

So when I had a batch of rice, that for some reason didn't get eaten (We forgot I made it!) I decided to make rice pudding. But seeing as it is fall, I decided to pumpkin-ize it!


Yum!

1 cup rice 
2 cups water
1 cup milk
2 cups pumpkin puree 
( I had roasted my own, you can use 1 can)
1 tbspn pumpkin spice
1/2 tbspn vanilla extract
4 tbspn brown sugar
2 tbspn butter
Raisins ( to taste)

Start by cooking your rice as usual, or use leftovers! 
Add rest of ingredients.
Cook on low until the consistency is not runny anymore.

Grab a spoon and Enjoy!

If you want a true pumpkin experience, leave the raisins out. If you want more of a rice pudding experience leave the raisins in. I think either way it is yummy!


Thursday, July 28, 2011

Nesting: Decluttering

I feel like all I want to do lately is declutter. With the thought of another boy joining our family in the next four weeks, all I want to do is throw out. Which might not be a bad thing either!

When it came to magazines I had a ton. 
Did I read them? 
Yes, but just to flip through here and there nothing life altering if they were to go,
 and I was saving them mostly for recipes that I may want to try in the future.

So over the the course of a couple days I sat down and ripped out any and all recipes of interest.  Then, another day I sat down with my meal planning binder and some loose leaf paper and went through the pile again. 


This time really paying attention to what I kept. If it had an ingredient that we don't like, or wouldn't be able to find, it went in the recycle bin. If it were a keeper, I just glue sticked it to a piece of loose leaf paper and it went in the proper section. 

No it's not the prettiest thing ever, but its functional for now. 

Next on my to do list? 


Fill out my meal planning for the next month or two to help with the post baby brain whats for dinner saga!

Wednesday, May 11, 2011

Seasoning Recipes

Ever started a recipe, or wanted to make a new recipe, only to find that is calls for "Taco Seasoning", a "Chili Packet" or maybe even "Cajun Seasoning"?
I have, and what's even more frustrating is the price of these super specific seasonings.  

So, using my dear friend Google on my phone in the grocery store one day. I made a huge money saving discovery. What was I thinking and doing before!  So there I was in the spice aisle only needing one tablespoon of Cajun seasoning. Instead of paying about $5 for a shaker of seasoning I may only use once in a blue moon. I searched on my phone what was in the seasoning and  found out what was in the seasoning and guess what I had all but one seasoning! I picked up the one ingredient for maybe $1-$2!

Another advantage?  My husband cannot eat super spicy things, so if the recipe calls for a full 
tablespoon (tbspn) of something I either cut it in half or add a teaspoon (tspn)!  
Same thing if your watching your salt, add a little less and taste it!

Now, the next thing I want to do is remember to save and wash my old spice containers so that I can store my mixes in them and label them!  I always forget to save the empty's!

Here are some of my favorite seasoning recipes!

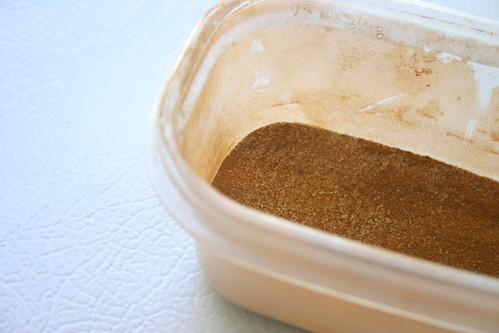
Cinnamon Sugar:

Cinnamon Sugar

Perfect for baking or breakfast recipes.
1 part cinnamon 
1 part sugar
(this way you can make a tiny or large batch!)


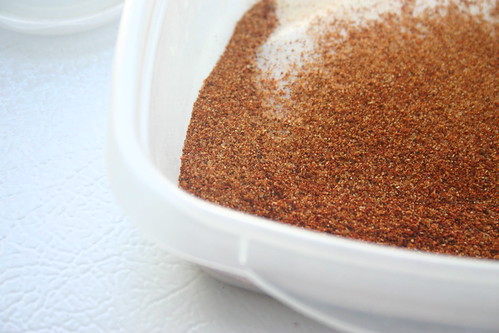
Taco Seasoning:
(Found in Family Circle Magazine, April 2011)

Taco Seasoning

2 tbspns onion flakes
1 tbspn chili powder
1 tspn garlic powder
1/2 tspn salt
1/4 tspn ground cumin
1/4 tspn black pepper

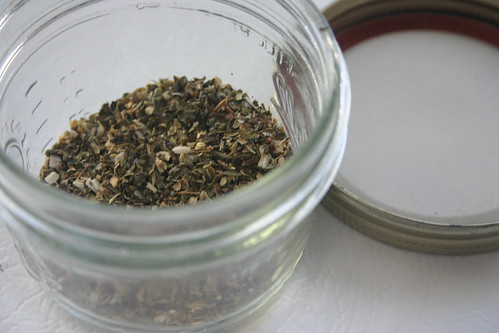
Greek Seasoning:
(I've added this to both turkey and lamb burgers. Yum!)

Greek Seasoning

1 1/2 tspn dried oregano
1 tspn dried mint
1 tspn dried thyme
1/2 tspn dried basil
1/2 tspn dried marjoram
1/2 tspn dried minced onion


(The following recipes do not have pictures)

Cajun Seasoning:
(I used in a jambalaya recipe a while back and was delish! 
Reminds me, I should make again!)
1 tbspn salt
1 tspn ground cayenne pepper
1 tspn pepper
1/2 tspn paprika
1/2 tspn onion powder
1/2 tspn garlic powder


Chili Packet Seasoning:
1 tbspn paprika
2 1/2 tspns salt
1 tspn onion powder
1 tspn garlic powder
1 tspn ground cayenne pepper
1 tspn pepper
1/2 tspn dried thyme
1/2 tspn dried oregano


My Grill Seasoning:
(This is our go to seasoning for anything grilled!)
(I just shake it on, and its never been bad!)
Garlic Powder
Onion Powder
Salt 
Pepper


Enjoy!
Also, I would love to hear some of your favorite seasoning recipes or combos! 
I love trying new things!


Wednesday, March 9, 2011

Crock Pot Pulled Pork

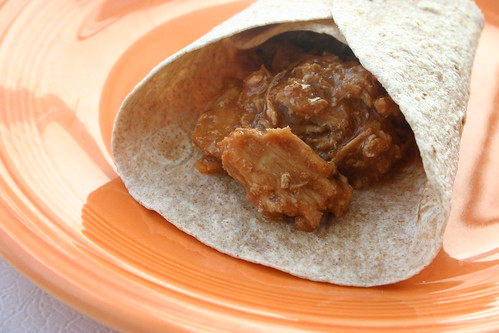
If you liked last weeks Crock Pot Mac and Cheese, you will like this Crock Pot Pulled Pork!  I actually made them both the same day to eat together. Yes, I did have two crock pots on the counter but I didn't have to do much more than pull them out and start them!

I used to do a Crock Pot Pulled Pork that you cooked it in the barbeque sauce and it was alright, but really messy when it came to pulling and shredding the pork. 
Since I found this recipe ( and I have no clue where) I won't make it any other way!

To start this recipe you need:
Onions
Garlic
Pork ( I have done it with roasts and tenderloins)
Water

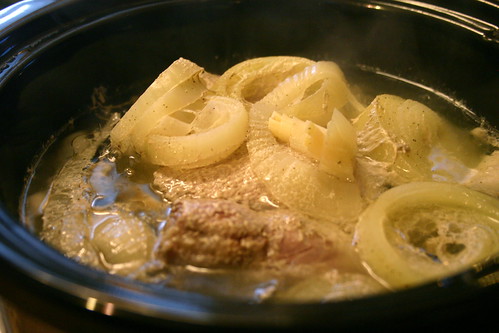
Slice your onions, separate them so you have the rings in the bottom of the crockpot.  Throw in some garlic ( if you like a lot go for it, a little you can do that too) then place your pork on top of the onion and garlic "bed".  Add enough water to cover your pork.

Now, here is the most difficult task.  Choosing to go low or high. Again I have gone both ways, depending on time.  If I start it in the morning or night before, low.  If I only have a couple hours high.

After a couple hours it should look like this, and most likely it is done. If you are unsure, you can use your meat thermometer.

Pulled Pork Before

Drain out your water, leaving the onions with the pork.  Pull pork apart  and add your sauce of choice.

Crock Pot Pulled Pork After

I will do this and seperate the pork into two batches. One for barbeque and one for non. Some nights we have pork sandwiches ( lettuce, tomato and onion), or some nights we just heat it up and eat with veggies.


Monday, March 7, 2011

Crock Pot Mac & Cheese

I love mac and cheese.  It's one of the first meals I conquered successfully over and over when I moved into my house.  Over the few years I have altered the recipe here and there. But now, I think I will never make mac and cheese the old fashioned way again.  This crock pot recipe saves you time, makes little to no mess and tastes so good! Think about it, normally you have to boil your pasta ( in one pan) and then make you cheese in another pan.  Now its all in the crock pot! Less dishes is always a plus here!

Now, the original recipe came from Family Circle ( and you have to log in to see the recipe... Boo.)  But I found the recipe online through a different blog, check it out here.

As usual, I did my own thing to the recipe!  Here's my version...

2 cups dry elbow macaroni
2 cups shredded cheddar cheese
8 oz American cheese
1 1/2 cups milk
2/3 dry milk
2 cups water
salt and pepper

Place all ingredients in crock pot, turn on high or low depending on your time frame.

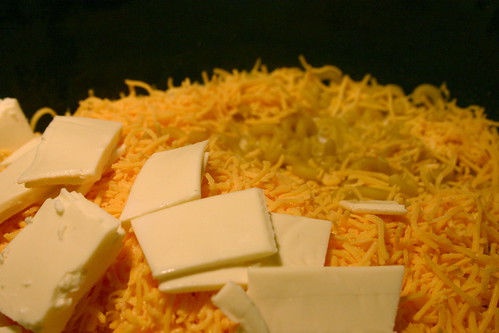
Crock Pot Mac and Cheese Before

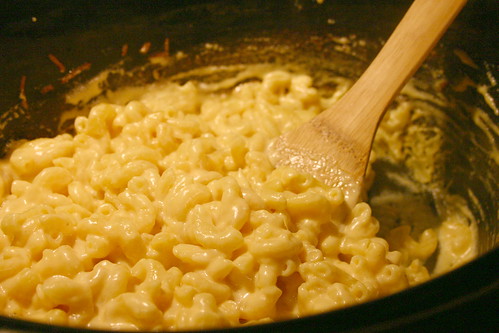
The recipe states to cook it on low for 4 hours or high for 3 hours. I did mine on low and it was done after 1 hour and a half. So keep an eye on it!

Crock Pot Mac and Cheese After

Enjoy!

Tuesday, March 1, 2011

Garbage Bread

If you "Like" us on Facebook, then you saw over the past weekend, I was dancing and baking some garbage bread.  Some asked what it is, and some asked for the recipe. So here's both!

What is garbage bread you ask? Well, here is what I know it as. It's a pizza dough rolled up with lots of fun concoctions. My easiest description, it is a pizza roll.  Some common garbage bread concoction I have seen and made, pepporoni and cheese, sausage and cheese, ham and cheese, broccoli and cheese.

When it comes to making garbage bread, you need a dough ( store bought or homemade), and your fillings.  There is really no science to how much filling you need, I just eyeball it.

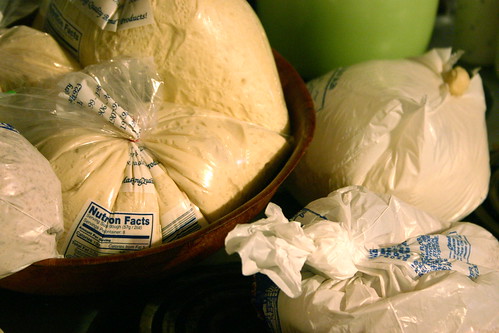
To start, you need to let your dough rise.  I purchase my dough ( even though I keep wanting to try to make my own...sigh.) and let it sit on the counter until it has puffed up in the bag it comes in.

Garbage Bread Step 1

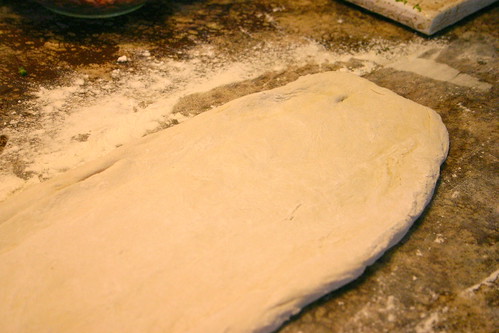
Then you need to stretch your dough, not like a pizza. More like a long skinny rectangle.

Garbage Bread Step 2

Then you fill it! I feel the more the merrier.  I start with my pepproni and then add the cheese.

Garbage Bread Step 3

Garbage Bread Step 4

And roll it!  Make sure you pinch your seam nice and tight, and I normally roll the seam on the bottom so the weight keeps it shut.

Garbage Bread Step 5

Bake!  I bake it for 30 minutes at 350 degrees and check it.  You want it nice and golden.

Slice and enjoy!

** Due to how delicious this is, we do not have any photos of it baked. But believe me! It's delish!**

Thursday, February 3, 2011

Cheddar Broccoli Soup

So, lately I have made Black Bean Soup, and Crab Chowder. This time I cheated, and used a starter kit.  But it was so good I had to share!

Have you ever heard of Shore Lunch?

I hadn't either until I found it in the soup aisle on sale.  And thought, what can it hurt?


Well I tried the Cheddar Broccoli and it was so perfect! I started my pan with some onion and garlic and then followed the directions. But at the last couple minutes added some more bigger broccoli pieces!  Delish.

Then the next night, I made a beautiful broccoli chicken casserole with it.
If you ever get the chance to try some Shore Lunch Cheddar Broccoli Soup, try it! I loved it!

Thursday, January 20, 2011

Black Bean Soup

Alright, I know I have already professed my love for soup just last week. But here is another winning recipe!

Given to me by a friend ( via Food Network), and then altered ( of coarse! I cannot leave anything alone!)

6 Slices bacon
1 onion
2-3 cloves garlic
16 ounces Chicken broth
1 squeeze ketchup (to thicken soup)
Worcestershire sauce ( I just did a shake or two)
4 cans black beans
1 can diced tomatoes with green chilies
1 can corn

So if you compare the two recipes, I increased my chicken broth ( by just a hair), added a can of corn and omited all the different dry spices because my green chilies gave plenty of flavor!

If you like Mexican style food you will love this soup!

Wednesday, January 12, 2011

Crab and Corn Chowder Recipe. YUM!

In the last two weeks, all I have wanted was some nice bowls of soup! Here in Upstate New York, its been cold, cold, snowy, and cold.  After talking to a friend about some of her favorite soup recipes, she walked me through my very first chowder!


Ingredients:
Bacon ( I used about 6 pieces, chopped)
1 yellow onion ( diced)
2-3 cloves of garlic
Chicken broth ( a couple cups worth)
5 white potatoes ( peeled, diced)
1 package imitation crab meat ( you can use real crab, clams, shrimp etc)
1 can of corn ( drained)
Milk or Cream ( depending on how rich you want it)

To start, take your chopped bacon and put it in the bottom of your soup pot, let it start to crisp up.  Once crisp, add your onions and garlic.  After a couple minutes add your diced potatoes on top.  Cover your potatoes with chicken stock ( or if you have fish stock, or juice from your clams).  Let this come to a boil, to cook your potatoes.  Once potatoes are cook add your crab, corn and milk. And your done!  I let mine heat through a couple minutes to thicken up. If you really want to thicken your chowder you can add a little cornstarch when the chowder is "bubbling", make sure to add in small amounts or else you might thicken too much!

Enjoy! I know I am!


Wednesday, January 5, 2011

Sorry to Sabotage!

If you started a New Years Resolution of no sweets, this post may not be for you!

I was asked to bring some dessert to a party for New Years Eve and here is one of the two things I brought.


Yum.  Chocolate Covered Peanut Butter filled Oreos! 

They were super easy, thats why there are no pictures!

I used candy melts that I picked up in Joann's, but I guess you could use chocolate chips too.  
Melt your chocolate ( either in microwave, double boiler, etc.)

Dunk oreos in chocolate ( I did half, and then went back and did the other half once first half was hard.)

The other treat I made was Brownie Covered Oreos! Yum!
The recipe is from Picky Palate, seen here.


She did not use cupcake liners, but I figured out after 2 batches why.
She only dipped one side of her Oreos, I went ahead and did both. Oops. 
My first two batches did not look pretty but they tasted wonderful!


But my third batch, using cupcake liners to not lose as much brownie,
 looked and tasted wonderful. 


I think the wording messed me up, Picky Palate says to dip and when I dip I get both sides. 
So I think you could eliminate some of the mess by just putting the Oreos in the muffin tins and then spooning a small amount of brownie batter on top.  
Now I just have to make them again to confirm this observation! 

Enjoy!

Tuesday, December 21, 2010

Orange Cream Cloud Trifle

This recipe is originally called Lemon Clouds, but with a few small ( and I mean really small) tweaks, you get this delicious Orange version.


I used one Angel Food Cake Mix, and baked per box directions.  Once cool enough to handle I cut it into pieces ( after a while I realized tearing worked just as well).  Then threw the pieces and one box of orange jello in a zip-top bag, then Shake Shake Shake!  Layer with cool whip or fresh whipped cream. And you have a easy, delicious trifle!


Thursday, December 16, 2010

Perfect Rolls

If you have been reading a while, you may have noticed that I enjoy cooking, almost as much as crafting. I have made banana bread, cake, rhubarb pie and more.  I would love to try to make home made bread, but I am not very patient.  With that said though, I am patient enough for these rolls. They are quick, and easy ( my kind of recipe) and I haven't messed them up the couple times I have made them!

Here's the recipe.

This year I thought it would be easier to knot them instead of roll.  And for me it took less time.  I baked them just the same.

Another reason to knot them instead of roll, I cannot get my dough to roll out in a circle, I ALWAYS get an oval!


Of course, all the evidence of these baked are gone!  Next time I make them (which will be next week, I will share the baked goodness!)


Tuesday, December 7, 2010

Lasagna Stoup Recipe

Are you a Rachael Ray fan?  Do you watch? Get emails? Or browse her site?  I signed up for a giveaway and now get the recipe emails, and sometimes those emails, I never seem to regret signing up for!


This recipe arrived in my e-mailbox and I had all the ingredients on hand, so what was there to lose?  In the end nothing! This was a super simple, fulfilling meal and took less than a half hour to make! Perfect for those busy, cold days!

Now with most of my recipes, I substitute ingredients or add things that I know we like, and that was another reason I loved this recipe!

Here's where I differentiated from the recipe:


  • I used dried basil instead of fresh ( No big deal)
  • I left out the carrots ( didn't have any on hand)
  • I blended some cottage cheese until smooth for Ricotta ( look it up, it really is a substitute! I didn't believe at first!)
  • I added hard boiled eggs! ( My grandmother used to add hardboiled eggs to her lasagna to make it a more filling meal, without adding more meat, try it you might just start doing it too!)


Tuesday, November 30, 2010

Pampered Chef "Ring"


Have you ever tried any of the Pampered Chef Ring recipes?  Yum.  I've tried them before, but had
never made them until now. These will definitely be showing up in my meal planning in the future!

I've tried the Reuben Ring, and the Chicken and Broccoli Ring.  But ours was a knock-off of the Chicken and Broccoli.  We did Chicken and Peas ( we had peas available, see how my cooking evolves? Make do with what you have?)

Super easy too!  Take Crescent rolls and make a circle, and add filling.


Fold points toward center and pinch shut.


And bake!


Carter was a huge fan!  So if you have picky eaters this may be an easy route to getting them to eat their veggies!  


Tuesday, November 23, 2010

Yummy. Sauce.

Do you garden?  Do you get a ton of tomatoes at the end of the season? And you just can't eat one more raw tomato?  Me neither. How about making some Yummy Sauce!


If you want a large amount of sauce you are going to need 2 to 3 times more (maybe even more) tomatoes then you will think. I am always surprised at how much you think you are going to get and what you really get.  Also, I have done my regular sized tomatoes with my cherry tomatoes, and have not had any issue.

First take all your tomatoes and either poke a hole in them or just crush with your hand into a cooking pot. I start my pot with a little garlic, onion and oil.  Let this cook down until it looks like this.


Once you have let your tomatoes cook down, strain them into a metal screen colander, over a big bowl. You may have to fill your colander a couple times before you empty your cooking pot.  Then take a spoon or pestle and crush your mixture through the screen. This makes removes your seeds and skins. See?

Once I have all my sauce through and have thrown out my seeds and skin, I place it back in my cooking pot, I add my herbs and spices and some store bought tomato paste.  The paste helps thicken it up.


The next step depends on how you want to store your sauce.  If you have a small batch, you can just put it in a jar and store in the fridge. If you have a lot and want to freeze it, go ahead and place in ziploc bags  or an other freezer safe container and freeze.  If you want to can your sauce, you will need to place the sauce in jars and boil them for about 30-40 minutes or so.


Enjoy!